Mrs. F.'s Sci Blog
  • Home
  • Homework
    • Living Environment
    • Chemistry
    • AP Biology/Fundamentals of Biology I
  • Resources (Class Supply Lists, etc.)
    • Student Resources >
      • Class Supply Lists
      • Living Environment
      • Chemistry
      • AP Biology
    • Parent Resources >
      • NYS Science Curricula for Living Environment and Chemistry
      • Course Outlines and Student Expectations
    • Teacher Resources
    • General
  • Other Interesting Stuff
  • NEW!! DIY Science
  • ChemClub

Welcome to DIY Science

Here you can find cool experiments and activities you can do at home.  Send me a picture of yourself doing an activity with mom or dad and I will post as part of the slideshow on this page!

Home

Homemade Ice Cream

7/1/2014

0 Comments

 
Picture
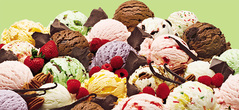
Here is a fun way to do science and create a cool treat!Materials:
  • 1 gallon-size plastic bag 
  • 1 pint-size plastic bag
  • Ice
  • 6 tablespoons of rock salt 
  • ¼ of a teaspoon of vanilla 
  • ½ of a cup of milk or half and half 
  • 1 tablespoon of sugar 
Fill the larger bag with ice and rock salt. These ingredients should take up about half of the bag’s capacity. Next, fill the smaller bag with milk, sugar, and vanilla and seal it tightly.

Put the smaller bag into the larger bag and seal the larger bag securely. Give the bag to your child and instruct him or her to shake it until the mixture turns into ice cream. The amount of time that this process takes depends on the enthusiasm of your child, but it should take about five minutes of constant movement.

As your child is shaking his/her bag, ask him/her what he/she thinks is happening. Explain that ice cream is made out of the ingredients that you put in the bag and that he/she are causing these ingredients to transform into a solid by shaking them. Ask what their favorite thing about ice cream is and why.

Once the ice cream is finished, open the large bag and remove the smaller one. Carefully open the smaller bag and pour the ice cream into bowls.  Enjoy!


And parents...to learn more behind the science of ice cream visit the following link: 
http://www.icecreamnation.org/science-of-ice-cream/

0 Comments

May 1st, 2014

5/1/2014

0 Comments

 
Picture
Here is a fun experiment to try that requires just a couple of supplies from your kitchen. Caution: this can get messy!
Gather the following:
1 cup water
1 to 2 cups cornstarch
Mixing bowl
Spoon
Food coloring (optional)
1.  Pour the cornstarch in the bowl. Feel the powder.  What does it feel like?  What can you tell about the size of the particles that make it up? 
2.  Pour the water in, a little at a time, first with a spoon, but then you might want to you your hand.  You want to reach a consistency which is between solid and liquid.  
3.  To test it...grab a potion of the oobleck. Pick up a chunk and roll it into a ball with your hands. Put the ball in the middle of you palm and don't move it.  It should turn to a liquid-y substance and run off your hand.
4.  Cool, right?
5.  When you are finished, clean up the area with soap water.

Try this:
Quickly poke at the surface of the oobleck with your index finger.  Does the substance act like a solid of liquid?
Now slowly insert your finger into the oobleck.  What does it act like now? 

Picture
Oobleck gets its name from the Dr. Seuss book Bartholomew and the Oobleck where a gooey green substance, Oobleck, fell from the sky and wreaked havoc in the kingdom.  This mixture is called a non-newtonian fluid.  It acts like a liquid until you apply forces to it.

Below is a a video of how some people had A LOT of fun with this really unique substance.

0 Comments

Ivory Soap Explosion

4/30/2014

0 Comments

 
Picture
Try this easy experiment!
You will need the following:
Bar of IVORY(TM) Soap 
A piece of paper towel or a microwaveable plate
A microwave
Other bars of soap for comparison (optional)
A hot pad
An adult helper


What to do:
1.  Unwrap the bar of IVORY(TM) Soap.
2. Place the soap on the paper towel or microwaveable dish and place in your microwave.
3.  Microwave your soap.  Watch what happens to the soap through the microwave's window.
4.  Continue to microwave the soap until you see no more changes.  Depending on the power of your microwave it may only take 90 seconds to 2 minutes or it may take longer.  You can go as long as 5 minutes and nothing bad will happen but you will stop seeing any changes.
5.  When your soap is "done", remove it from the microwave using a hot pad (BE CAREFUL!  THE SOAP WILL BE HOT!!) and let it cool for a minute or two. Let your adult helper decide when it is safe for you to touch the soap with your hands.
6.  You can play with it after it is cool.  Add a bit of water to your hands and you can mold it into shapes.  You can use the soap.  It will still lather up when wet.
7. OPTIONAL: You can repeat the experiment using the other types of soap to see what happens.
Questions:
What happened to the IVORY(TM) soap? Is this a physical or chemical change?
Why do you think the soap behaved this way? HINT: What does IVORY(TM) soap do when placed in a bowl of water? What do other brands of soap do when place in a bowl of water?
Break a bar of IVORY(TM) soap in half.  Do you see air pockets?  What does air do when it is heated (HINT: think of a hot air balloon)? 
Did any other brand of soap explode? Why or why not? 


0 Comments

Spot the Station

4/8/2014

0 Comments

 
Picture
Have you are your children seen the International Space Station as it traverses the night sky over Otsego County?  It is the third brightest object in the sky and it is easy to see if you know when to look. Sign up at http://spotthestation.nasa.gov/ and an email will be sent to you stating when and where and for how long the station will be overhead. 

0 Comments

Magic Colored Milk

4/7/2014

0 Comments

 
Picture
Here is a really cool and easy experiment to try at home:
Materials: 
Whole or 2% milk
food coloring
liquid dish soap
cotton swab
plate or bowl

1.  Pour enough milk in the plate to cover the bottom.
2. Add drops food coloring on the milk..
3.  Dip the swab into the soap.
4.  Touch the swab to the center of the milk.
5.  Don't stir.  It is not necessary.  It will do something cool all by itself. Hint: if you want to do this again, make sure you clean the plate really well.

Questions:
Why do you think this happened?
What would happen if you used different types of milk (1%, skim, half and half)?
What would happen if you added more drops of coloring?  Fewer drops?
What would happen if you added more soap? Or a different kind?


0 Comments

    Archives

    July 2014
    May 2014
    April 2014

    Categories

    All
    Food Coloring
    Ice Cream
    International Space Station
    ISS
    IVORY(TM) Soap
    Microwave
    Milk
    NASA
    Soap

    RSS Feed

School Website

School Facebook

Proudly powered by Weebly
Contact Me
About
Photo used under Creative Commons from arvindgrover